The Wawona 6 tent is a spacious and durable tent that can comfortably accommodate up to six people. Setting up this tent may seem like a daunting task, but with the right approach and a little bit of practice, it can be done smoothly and efficiently. In this ultimate guide, we will walk you through the step-by-step process of setting up your Wawona 6 tent.
Before you begin setting up your tent, it is important to choose a suitable location. Look for a flat and level area that is free from rocks, roots, and other sharp objects that could potentially damage the tent floor. Additionally, consider the direction of the wind and the position of the sun to ensure maximum comfort during your camping experience.
Once you have found the perfect spot, unpack your Wawona 6 tent and lay out all the components. Familiarize yourself with the different parts, including the tent body, rainfly, poles, stakes, and guylines. It is essential to have a clear understanding of how each component fits together before you start assembling the tent.
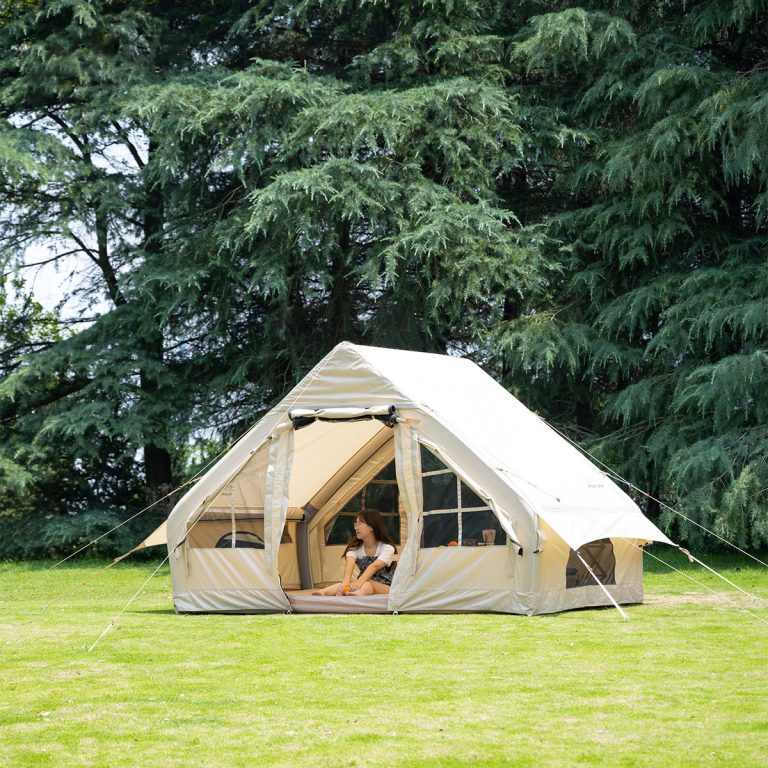
Begin by laying out the tent body on the ground, making sure it is oriented in the correct direction. Next, assemble the tent poles according to the instructions provided. Insert each pole into the corresponding pole sleeves on the tent body, ensuring that they are securely in place. Once all the poles are inserted, raise the tent by gently pushing up on the center of the tent body.
With the tent standing upright, it is time to attach the rainfly. The rainfly provides an extra layer of protection against rain and wind. Place the rainfly over the tent body, aligning the attachment points with the corresponding loops or buckles on the tent. Secure the rainfly in place using the provided clips or straps.
Now that the tent and rainfly are properly set up, it is time to stake down the tent. Start by staking down the corners of the tent, ensuring that the stakes are driven into the ground at a 45-degree angle for maximum stability. Once the corners are secured, move on to staking down the guylines. Guylines help to further stabilize the tent and prevent it from swaying in strong winds. Attach the guylines to the designated loops on the tent and stake them down at a 45-degree angle.
After staking down the tent, take a moment to check the tension of the rainfly and guylines. Adjust them as necessary to ensure a taut and secure setup. Finally, step back and admire your fully set up Wawona 6 tent.
Taking down the tent is a reverse process of setting it up. Start by removing the stakes and guylines, followed by detaching the rainfly. Carefully disassemble the tent poles and remove them from the pole sleeves. Once the tent is disassembled, fold it neatly and pack it back into its storage bag.
Setting up a Wawona 6 tent may require some practice, but with time, it becomes a straightforward process. By following this ultimate guide, you can confidently set up your tent and enjoy a comfortable camping experience. Remember to always refer to the manufacturer’s instructions for specific details and guidelines. Happy camping!
Exploring the Vibrant Atmosphere of New Delhi’s Tent Market New Delhi, the bustling capital city of India, is known for its vibrant markets that offer a wide range of goods and experiences. One such market that stands out is the new delhi tent market. This market is a treasure trove…
Essential Fishing Gear for Beginners: A Review of Landed Fishing Co’s Beginners Fishing Kit Fishing is a popular outdoor activity that offers relaxation, excitement, and the opportunity to connect with nature. For beginners, getting started can be overwhelming, as there are numerous fishing gear options available on the market. However,…
The Ultimate Guide to pa deer hunting camp 2022 The Ultimate Guide to pa deer hunting camp 2022 Deer hunting is a popular and time-honored tradition in Pennsylvania. Every year, hunters from all over the state gather at deer hunting camps to embark on their quest for the elusive whitetail…
Exploring the Features of the north face 4 person tent The north face 4 person tent is a popular choice for outdoor enthusiasts looking for a reliable and spacious shelter. This tent is designed to accommodate up to four people comfortably, making it perfect for family camping trips or group…
Essential winter hunting gear: Stay Warm and Prepared in the Cold Winter hunting can be a thrilling and rewarding experience, but it also presents unique challenges. The cold temperatures and harsh conditions require hunters to be well-prepared and equipped with the right gear. In this article, we will discuss essential…
How to Choose the Right Tent for a Group of Five People: Tips and Considerations When it comes to camping with a group of five people, choosing the right tent is essential. Here are some tips and considerations to help you make the best choice: 1. Size: Make sure the…

 Begin by laying out the tent body on the ground, making sure it is oriented in the correct direction. Next, assemble the tent poles according to the instructions provided. Insert each pole into the corresponding pole sleeves on the tent body, ensuring that they are securely in place. Once all the poles are inserted, raise the tent by gently pushing up on the center of the tent body.
With the tent standing upright, it is time to attach the rainfly. The rainfly provides an extra layer of protection against rain and wind. Place the rainfly over the tent body, aligning the attachment points with the corresponding loops or buckles on the tent. Secure the rainfly in place using the provided clips or straps.
Begin by laying out the tent body on the ground, making sure it is oriented in the correct direction. Next, assemble the tent poles according to the instructions provided. Insert each pole into the corresponding pole sleeves on the tent body, ensuring that they are securely in place. Once all the poles are inserted, raise the tent by gently pushing up on the center of the tent body.
With the tent standing upright, it is time to attach the rainfly. The rainfly provides an extra layer of protection against rain and wind. Place the rainfly over the tent body, aligning the attachment points with the corresponding loops or buckles on the tent. Secure the rainfly in place using the provided clips or straps.